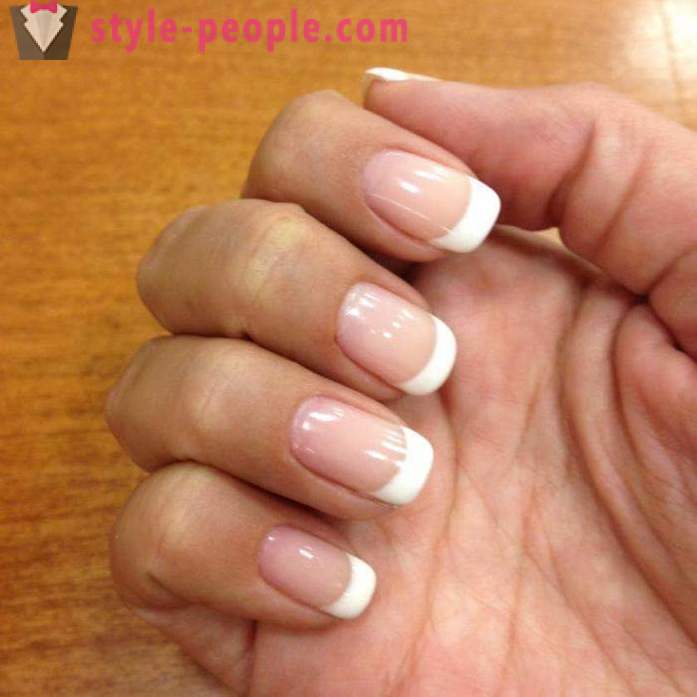
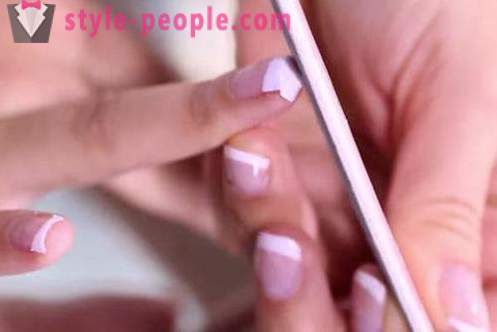
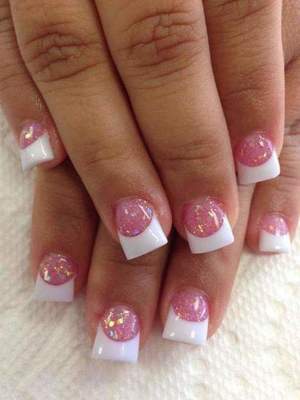
French shellac: step by step guide
Each of the fairer sex wants to look dazzling. To do this, girls and women are regularly applied to the skin cosmetics and choose the right outfit. However, the way the ladies will not be completed without additional small parts. Not the least role in the appearance of a woman playing a manicure. In this article we will focus on coating jacket shellac. You will learn methods of applying design and get acquainted with its features.
How to make a jacket with shellac?
If you have decided for the first time to do this design, you should contact a specialized shop. That's where experienced craftsmen to easily create beautiful "smile" on your marigolds. experts also pre-treated plate so that the jacket shellac kept long and pleased its possessor is not less than one month. It is worth recalling that this pleasure will cost you a certain amount. Apply to the nails shellac (French) costs about 500-1000 rubles. It all depends on the degree of specialist skill.
If you want to save money on a manicure and to learn to cover the nails with shellac, it is necessary to stock up on the necessary attributes. You will need a lamp for drying the gel a few different brushes, strip to create a "smile", the basis and the appropriate color nail polish, as well as the crowning finish. Do not forget the manicure equipment and things like nail polish remover or degreaser with napkins. How to make a jacket with shellac at home? Consider a guided walkthrough of creating classic designs.
The first step: preparation of the nail
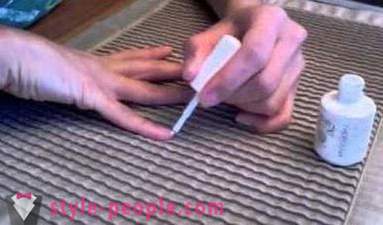
Before you start to impose shellac (French) on short nails, as well as a long, base plate should be applied. Before that should make a preliminary treatment of the cuticle and the horny layer of marigold. In order to cover kept longer spilite soft polishing surface or tool claw. Do this very carefully and gently. At strong damage you can earn serious problems.
When all nails are processed to remove excess cuticle. Use a pliers or scissors. Also you can use a special device for processing. Remember that before you make a jacket with shellac, manicure wet can not be performed. Otherwise, coating may be difficult to adhere to the plate.
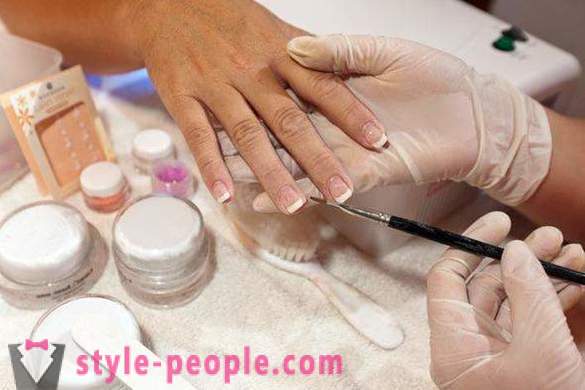
The second stage: the application base
French shellac applied only after putting some base. If you naroshchennyh nails, then skip this step. When this color is laid directly on a layer of gel or acrylic.
Framework should be applied with a wide brush. Carefully paint over each nail. Try here as if to rub foundation brush into the plate. After processing of one hand place it on the lamp. Drying should last about two minutes. Similarly proceed as with the second hand.
The third step: the creation of color
What will be your nail design? Shellac (jacket) can be colored or classic selected. If necessary, applying foundation do this procedure. Choose a pastel or bright colors. Remember that the manicure should be complementary to the base image, and not to be the center of attention. After creating dry the coating in the lamp. Hold the handle in the device costs about three minutes.
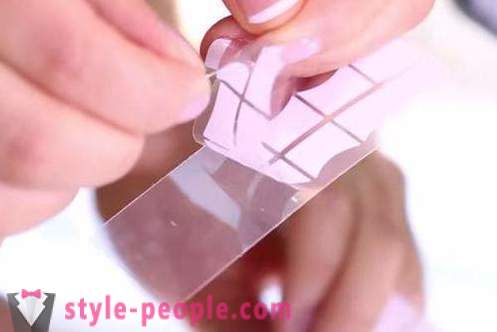
The fourth stage: vyrisovyvanie smile
If you speak well enough with a brush, then use it to create her smile. Place a small amount of the desired color on the palette, and from there take the tone and create a smile. To manipulate you need a very fine brush.
If you do not have the skills of art, get special stencils. They may be disposable. These are glued to the tip of the nail. Also recently become increasingly popular reusable stencils. They are made of soft silicone and is suitable for multiple applications. Apply the tip of the selected tool claw and cover voids suitable hue. Remember that all the layers need to be very thin. Otherwise just shellac wrinkle during drying.
The fifth stage: the completion of
When you dry the resulting coating can be applied to additional elements. It can be a variety of patterns with shellac or acrylic paints. Wizard also often use decorative elements such as strass, sequins, beads and so forth.
After fixing the chosen decor can make a crowning finish. The basis is rather liquid consistency and is more like a conventional clearcoat. This substance must also be dried in the tube. Treat nails for five minutes. Thereafter manicure vote quality and correct defects, if necessary.
Summary of the article the results of
You now know how to make a design jacket shellac. Remember that the first time you can get a little distorted result. But after a few workouts you can easily create a beautiful cover for your nails.
To remove shellac and made the French manicure need to purchase a special composition. Just drop it in your fingers and clean off the spatula gel coat. You can also use ordinary nail polish remover and foil. Simply apply makeup on a swab, apply it to your finger and wrap the mirror paper. After ten minutes, remove and clean the plate blank. I wish you success!


- Most popular
-
 Arturo Gatti: Biography, cause of death
-
 Alexander Gusev: photos, biography, sports career, interesting facts
-
 Tatiana Tarasova: biography, personal life, photos
-
 Dress code: types and rules. Description of the main types of address of code and practical advice on compliance with all the rules.
-
 What is Zumba-Fitness? ZUMBA - Dance fitness program
-
 Viktor Onopko, football player: biography, personal life, sports career
-
 Maria Petrova - skater, a teacher and mother
-
 Ronnie Coleman: Biography, interesting facts of life
-
 Pink manicure with white: design ideas
-
 Baked powder "Pupa": reviews, palette, applying the rules. powder Pupa
-
 Dennis Bergkamp - Dutch football coach. Biography sports career
-
 Paint Igora Royal: color palette
-
 Japanese sword: name, types, production, photos
-
 Beautiful makeup day. How to make a day makeup for gray eyes?
-
 Haircut cascade on short hair: new image