Nail extensions on tips gel and acrylic
Today is a very popular trend among fashionistas such as artificial nails. It makes it possible to provide a well-groomed nails, even the representatives of the fair sex, who are by nature brittle and weak. Nail tips on popular topics that are easier to care for than real. It is very much appreciated and makes the girls are false products more popular.
There are two build-up method. Let us examine them in detail.
Acrylic nail
The material used in this procedure contains a liquid component and a powder that improves adhesion quality natural and artificial nails. Acrylic nail tips to use more than 20 years. First manicure started to use this tool in cosmetology, borrowing it from the dentists. And all thanks to the sustainable and efficient outcome - acrylic method is more reliable than the gel.
Gel nail
In the gel method for nail using Biogel made based resin conifer. They are used as natural and semi-synthetic components. Due to the ingredients used manicure has a natural appearance, and nail plates become more shiny and smooth. The big drawback of this technique is the brittleness of the material after final processing. When there is a breakdown or a crack, it requires a new gel nail extensions on tips.
What are the tips?
Tipsy - is false, plastic molds, which are used as templates. On the number of them in the package depends on the value of the product. Minimum fixed at 10 rubles, but there are products from 400 rubles and above. Popular form templates are pointed or rectangular appearance, but there may be more bizarre and original copies. Nail extensions on tips at home - a fairly simple technology. It is necessary to choose the desired pattern size on the basis of the sizes of natural plate. When glued plastic molding, it is necessary to give the desired look. You can then select the technology: acrylic or gel. Nail extensions on tips - a simple way to give your Palchikov unique look.
Materials for self-build acrylic
The set consists of the following materials:
- dehydrator;
- monomer;
- bonder;
- primer;
- a top coating;
- acrylic powder;
- cleaning products - tools and hand;
- Locking Gel.
Tools for self-build gel
Here's what you need:
- to move aside the cuticle - the blade;
- UV lamp;
- nail file;
- glue;
- tipsy or shape;
- to soften the cuticles - oil;
- grinder or buff;
- drop-shaped artificial or natural brush to build up;
- to remove dust - brushes;
- jewelry - rhinestones, feathers, stickers, etc.
..
What is UV lamp to choose?
Nail extensions on tips for beginners will not work without the UV lamp anyway. It is useful regardless of the method chosen. To dry a typical coating would be enough for the device with a lamp 9 watts.
If you use the French-conceived design or colored gel varnish, then it is necessary to choose a lamp power of 37 W and 4 light elements. Acrylic nail file is recommended to be used with grit 80 grit, gel will need a tool with grit 100 grit.
extension using acrylic
The following will be considered acrylic nail extensions on tips: step by step instructions for independent work.
- First of all, all the tools and materials you need to prepare for the future process.
- After that should be treated with an antiseptic all the nails (e.g., hydrogen peroxide).
- Push the cuticles and then get rid of excess skin.
- The surface of the plates thoroughly sanded.
- For each nail pick up tips - it is as accurate as possible must fit.
- sawed edge shape, which is adjacent to the natural plate, apply glue to the inside of the template and paste it.
- When the glue dries, the length of the tips may be excessive, it is recommended to remove any excess with a nutcracker.
- When you want to erase the distinction between decorative and natural nails. For this is well suited special nail file sanding.
- The preparatory stage completed. The next stage of work on the nail will be applying acrylic. You need to drop the brush into the monomer-liquidity, then - in the acrylic powder. The resulting ball to be distributed over the surface of a thin layer of the nail plate. As the mixture hardens instantly, you need to work quickly and accurately.
- Depending on the desired amount of liquid nail thickness layers will be different. After the material hardens, it needs resurfacing - lacquer lie flat on a smooth surface only.
- Items 9 and 10 should be repeated for all the nails, then inject the same length and shape and polished to smoothness.
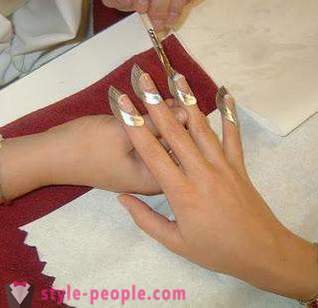
- The last stage of building - design and decoration.
Step by step nail extension on tips allow at home to perform the full range of activities to achieve the best result.
extension of the gel using
At home, the process of nail gel-based rather simple, if you approach this problem responsibly and seriously.
Below is the step by step instructions that will help budding fashionistas.
- The first step is to prepare a nail: shift cuticle, cut the excess portion of the skin and leave some free space from the edge of the plate of natural - about 2-3 mm long.
- Grind the surface, then put his finger on the form and under the nail concatenate its edge.
- The next step is applying the gel layer to place a natural plate, then it is necessary to extend the adding portion to form to the desired length.
- Dry the mixture under a UV lamp.
- is then applied to an additional layer of gel. 1-2 mm to be left intact cuticle and dry weight under a lamp.
- After solidification structure very carefully so as not to spoil, clean shape and trim the nail derived.
- The last step: cover plate artificial paints of different colors and decorate to suit all tastes.
Features gel and acrylic in daily life
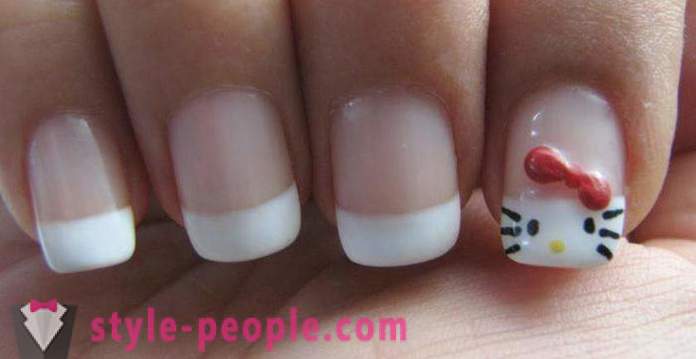
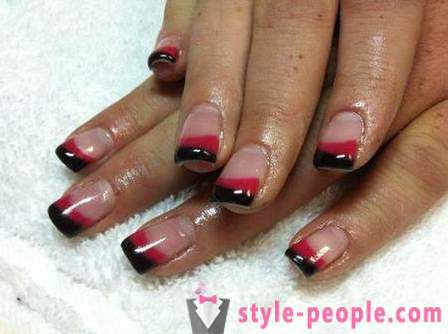
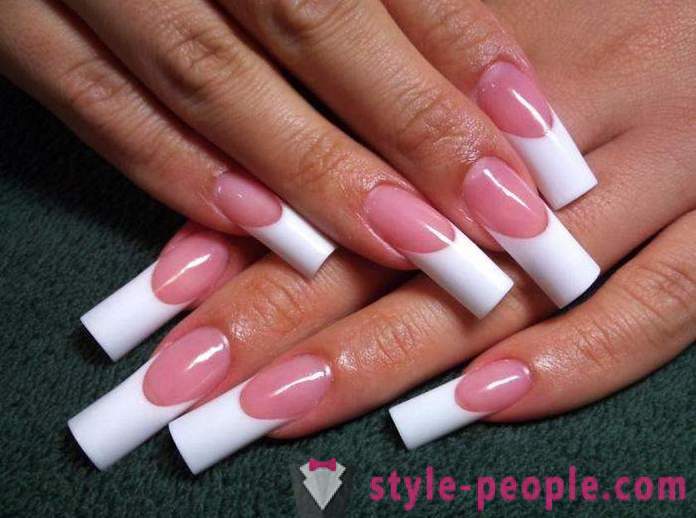
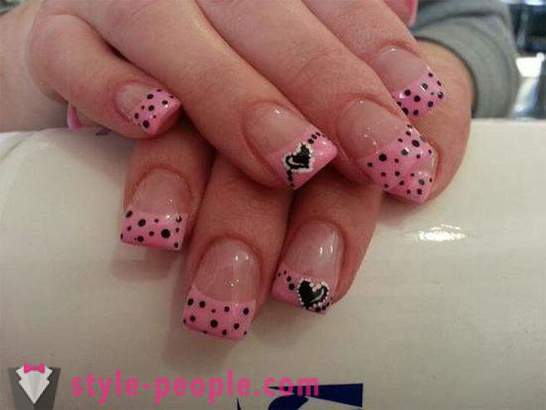
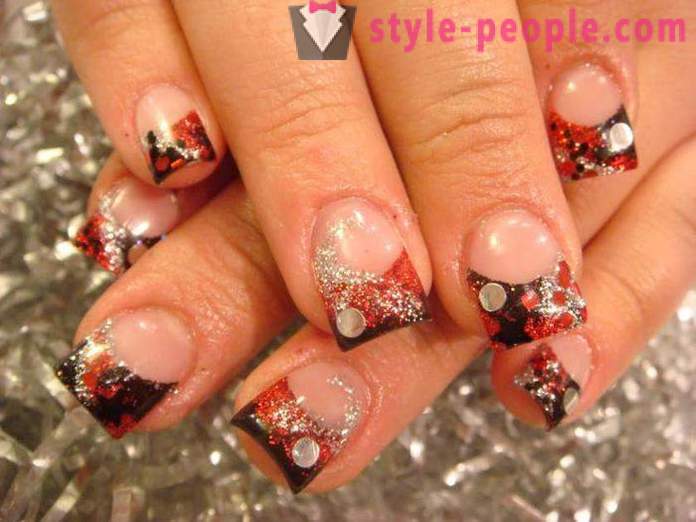
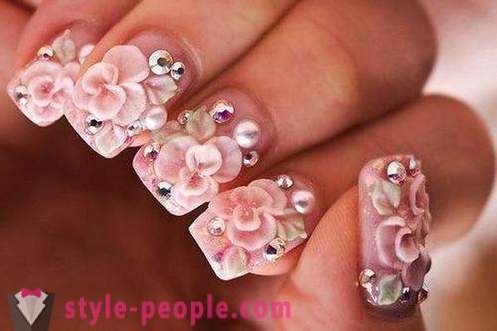
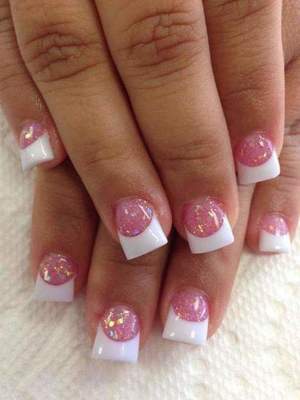
Nail extensions on tips, a photo of which are shown above, and the gel show: the one and the other cover looks very nice.
According to the elasticity of the gel is similar to the natural nail plate and bends well with it. It can cover and process the lacquer compositions with acetone content without worrying for integrity. Gel capricious less than acrylics, but rather has one big disadvantage - brittleness at low temperature (from a sharp drop and frost cracking composition). Also, he often breaks off than acrylic. Acrylic more durable and flexible than the gel manicure, break less often. It has the following shortcomings in the operation:
- variability color - under the influence of various kinds of chemicals (household chemicals, nail polish) acrylic yellowing;
- matte finish - to achieve the gloss, it is necessary to cover plate further transparent varnish or additionally order the service - applying "waterglass", which will increase the final cost of the operation;
- You can not use acetone nail polish remover - surface cracks.
In any case, both ways of building requires careful handling. Nails should be protected from mechanical damage. In stepping through the gel breaks PU part but remains intact natural regrown layer. When the acrylic method is often damaged the nail itself, which is more insulting and painful.
Removing acrylic and gel
Acrylic is removed fairly easily and quickly - nails must be lowered in a special solution, the composition becomes soft, then it can be easily removed spatula. This procedure can be carried out independently by acquiring the necessary components.
When removing polish naraschonnyh need long and tedious to file down the gel, which is a significant disadvantage of the coating. In the process of removal produces a lot of dust. At home to take part it is not recommended - there is a very high risk of spoiling the natural plate.
In both cases, making the nail on tips, nails need time to recover after the removal.
to nail gel and acrylic prices
- Capacity under the paint - from 2 thousand rubles..
- Extensions on the length of more than 3 mm - 3 thousand rubles..
- Manicure without extension - from 1000 rubles.
- French - about 3 thousand rubles..
For removal rates vary in the range of 500-1300 p. for all the work.
Conclusion
Now you know how the nail on tips. Step by step instructions given above will help you avoid mistakes in the process. Dare, create!


- Most popular
-
 Arturo Gatti: Biography, cause of death
-
 Alexander Gusev: photos, biography, sports career, interesting facts
-
 Tatiana Tarasova: biography, personal life, photos
-
 Dress code: types and rules. Description of the main types of address of code and practical advice on compliance with all the rules.
-
 What is Zumba-Fitness? ZUMBA - Dance fitness program
-
 Viktor Onopko, football player: biography, personal life, sports career
-
 Maria Petrova - skater, a teacher and mother
-
 Ronnie Coleman: Biography, interesting facts of life
-
 Pink manicure with white: design ideas
-
 Baked powder "Pupa": reviews, palette, applying the rules. powder Pupa
-
 Dennis Bergkamp - Dutch football coach. Biography sports career
-
 Paint Igora Royal: color palette
-
 Japanese sword: name, types, production, photos
-
 Beautiful makeup day. How to make a day makeup for gray eyes?
-
 Haircut cascade on short hair: new image