Design for nails for Beginners (step by step)
For girls manicure is as important an attribute as make-up, because the hands can tell a lot about the owner. But a visit to the master not everyone can afford, and in many cases it is difficult to find time to go to the salon. For those who want to master this skill of nail design for beginners - a good start.
What is to prepare
Create drawings and patterns can not be without any adaptations. Their quantity and quality depends on the purpose of the novice master and the degree of skill. In any case, in order to represent the nails intricate patterns, it is desirable to have in your arsenal:
- set of colored paints of different densities;
- rhinestones;
- stickers;
- brush;
- wooden and metal sticks;
- set for stamping.
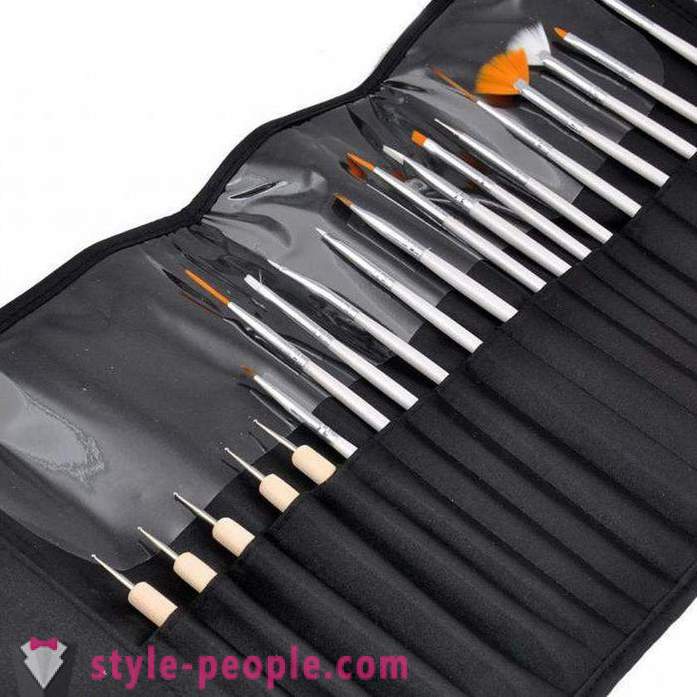
The use of these tools greatly expands the possibilities of the master. Of course, professionals use a variety of devices, but for a start it will be enough.
Nail designs for beginners: photos, instructions, process descriptions - all of this is given in the article.
Getting Started
First of all, you need to determine what you want to see on the nails. Manicure can be:
- daily monotonous;
- with contrasting shades or related;
- in various patterns;
- with applications from different materials - both special and scrap;
- the same on all nails or with variations.
The coating can be accomplished by:
- nail polish;
- gel lacquer;
- gel capacity.
There are many techniques that are easy to replicate, even if you are new and do not have the drawing skills. Next, consider the design for the nails for the novice step by step, the different versions.
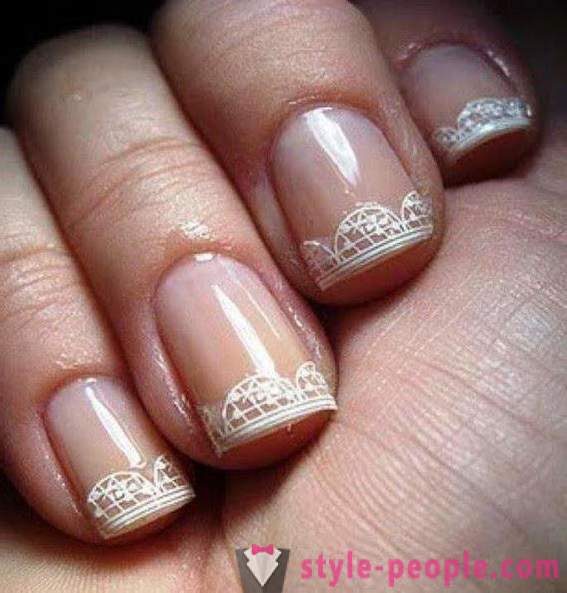
A timeless classic
Always actual "French" manicure. there is a hard dress code in your company? White-transparent color combinations complement the business image. If you want to stick with the classics, but make it unusual, change the main colors to bright, and personality will be evident.
And now more about how to make a French design polish for beginners: analyze step by step all the stages.
- On the prepared nails, apply a base lacquer base. He usually transparent color.
- is either transparent or pastel tone any basis for his tunic. Apply it on the dried basis, wait until dry.
- The most critical part - drawing of white (or whatever color) free edge. If the hand is not packed full of paint and you do not know really, you can use special stencils - strips. They can be either rounded, and angular. Glue them on nails and apply a lacquer to the free end of the desired color. After it dries, remove the stencils. Important! Do not tear off a strip immediately field painting: varnish can stretch and threads of preprinted paper.
- Put the finishing fixer.

Done! Color or classic French manicure is always fashionable and relevant. Crystals can dilute it, upstream of the finishing coating, apply line Glitter using a fine brush to neprosohshy lacquer layer.
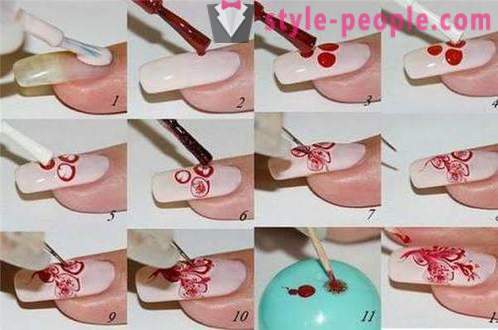
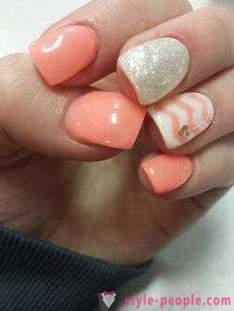
Drawing needle
Prints often requires the ability and skill masters, besides his left hand on the right to draw uncomfortable. But there is a way for the realization of which does not need to be an artist. nail designs for beginners could easily be mastered with the use of this technique. How it's done:
- Apply a base substrate, after drying, cover the nail varnish color.
- Do not wait for the last coat has dried, apply a few peas of different color varnish ;.
- Just take a needle and begin to do: draw lines in different directions, creating patterns. Flowers, ornaments - someone in that much. Add drops of other colors.
- Attach the arts dried topcoat.
Images tape
Design for nails for beginners can be mastered with the help of a variety of available tools. Fashion Nails can be created using regular tape, or special adhesive strips. With their help, and the obtained mosaic image graphic quality.
Let's get started:
- Prepare varnishes least 2 colors.
- Apply a nail base and the first layer of bright-basis.
- After their drying glue strip arbitrarily, in its sole discretion.
- Cover the resulting structure the second type of varnish or multiple.
- After curing, remove the layers of tape and secure the topcoat.
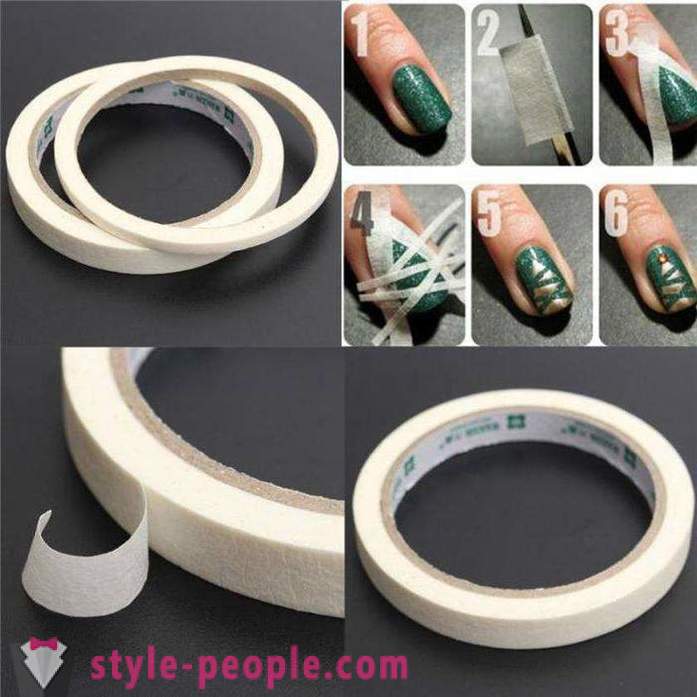
The undeniable advantage of this technology is its versatility: a manicure is difficult to mess up, because no one knows exactly what the picture you wanted. Adhesive tape, you can create not only complex geometries, but also an ordinary jacket.
When using a special thin self-adhesive strips you can create bizarre combinations of colors as the paint and strips themselves - just do not remove them.
Stamping
nail designs for beginners or experienced artists - a creative process. It is always possible to give your imagination run wild and create your individual print. But it happens that I want to portray something unusual, some interesting pattern is the same for a few nails, but the artistic skills you do not possess.
There is a set of tools for stamping, which allows to create a design for the nails, for beginners or masters - it does not matter, they are many. What to include:
- the plate with the drawings and ornaments;
- the die to transfer the image;
- scraper to remove excess polish.
What do you want to work:
- lacquer base which will serve as the background of the composition;
- silnopigmentirovanny dense spray pattern transfer;
- top-fixer.
Stamping nail design steps for beginners:
- Cover nail color base and allow it to dry.
- Put the interests of the pattern on the plate thick varnish.
- Remove excess scraper, keeping it at 45 0. Do not press too hard, so as not to overdo it.
- Take the stamp of the rolling movement of the slide it across the drawing on the plate and drag in the same way on the nail. Actions should be clear, confident, fulfilled once.
- Remove excess polish with the repressed image on the plate with nail polish remover, cotton swab stitched and toothpicks, then they can be used again.
- Attach the dried composition on the nails finish.
Gel Polish
Modern nail coating lasts longer than usual, because it is preferred by many women.
Using gel varnish at home - a phenomenon as common as normal manicure. It is enough to have an idea about the technique of deposition and consolidation, with the rest of difficulties would arise.
How to create a design nail gel polish for beginners? Specific instructions in this regard is not because techniques of drawing and drawing images remain the same: the creation of his tunic, the application tape images with a needle, the use of stickers, rhinestones. The only difference from operation with a simple lacquer - in case of error or inaccuracy in the movement of drawing you do not have to remove the entire cover fully enough to remove or correct a wrong bar without drying. Fashion trend is drawing points different patterns on top of the dried color layer.
gel nail extension: Design
There are many types of tools for modeling manicure. Gel capacity is used not only to increase the length of the nail, but also for creating various patterns and textures.
gel nail design for beginners can have a few options:
- single color coating and the use of labels, crystals;
- drawing at escalating;
- trendy design "aquarium".
The image formed by known methods prior to fixing the top layer.
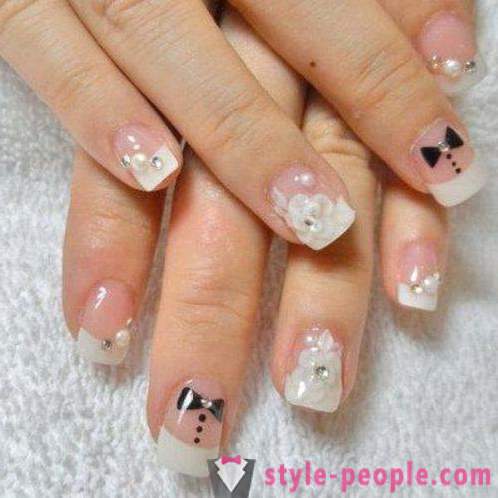
Solid manicure - the easiest in the making. After applying the preparatory create colored layers or a transparent base on which is fixed crystals, labels and then fixed with a protective coating. The features and advantages of this design is its reliability and durability.
Drawing at escalating, or coating its length - the most common variant decoration. Anything: patterns, jacket, combination of colors and materials - that fancy enough.
"Aquarium" - a fashion trend in nail design. Its essence consists in drawing the image in the body of the nail plate, rather than the top, which creates the illusion of an unusual volume. Inside, this is more expensive than usual, but it is quite simple:
- Apply the primer prepared on the nail;
- If you wish to make a normal build-up, but you can do without it;
- Put a translucent paint or colored gel on the nail tip and the middle of it, leaving the base free;
- Next, create any image: plain strokes, sequins, rhinestones, stickers;
- Put a thick one or more layers of transparent gel. Thus the image will deepen the base nail volume.
There are several ways to create such a design given to domestic play - the most optimal.
We have considered just a few ways to create simple forms for beginners manicure masters. There are many techniques:
- Color Stretch "Ombre";
- artistic modeling;
- picture conversion and so. E.
In the course of development of the decoration of nails you are sure to learn a lot, learn how to perform different types of design.


- Most popular
-
 Arturo Gatti: Biography, cause of death
-
 Alexander Gusev: photos, biography, sports career, interesting facts
-
 Tatiana Tarasova: biography, personal life, photos
-
 Dress code: types and rules. Description of the main types of address of code and practical advice on compliance with all the rules.
-
 What is Zumba-Fitness? ZUMBA - Dance fitness program
-
 Viktor Onopko, football player: biography, personal life, sports career
-
 Maria Petrova - skater, a teacher and mother
-
 Ronnie Coleman: Biography, interesting facts of life
-
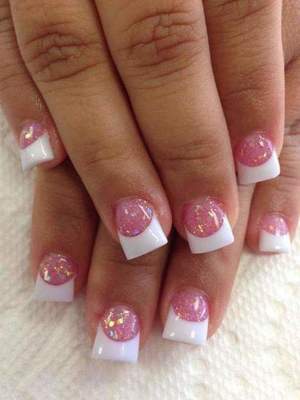 Pink manicure with white: design ideas
-
 Baked powder "Pupa": reviews, palette, applying the rules. powder Pupa
-
 Dennis Bergkamp - Dutch football coach. Biography sports career
-
 Paint Igora Royal: color palette
-
 Japanese sword: name, types, production, photos
-
 Beautiful makeup day. How to make a day makeup for gray eyes?
-
 Haircut cascade on short hair: new image